
Florafelt Pocket Panels - Wood Framed Install
Guides: About | Design Ideas | Install Guide | Drip Irrigation Guide
Mounting: Hang On Hooks | Wood Framed | Recirculating | Custom Sizing | Mount On Stucco
Specs: Spec Sheets | Architectural Specifications
Example Wood Framed Installation
Here is an example installation for a 8 feet wide x 6 feet 4 inch high Florafelt Pocket Panel wall with wood framed edges. For this install we are using a total of 9 – 12 Pocket Panels, stacked 3 units wide by 3 units tall. For other sizes you can adjust the dimensions to suit your custom installation.

1. Mark Wall
Determine the width by adding the widths of all the panels you plant to use. In this case there are 3 – 32-inch panels side by side which equals exactly 8 feet overall width. For the height add the heights of each panel. For this install there are 3 24-inch panels which equals 6 feet in height. To allow for the drain tray and a 2-inch gap at top and bottom, add 4 inches to this vertical dimension for a total of 6 feet and 4 inches for this project.

2. Air Gap Supports
An air gap will help keep the wall dry. Horizontal supports are also good to allow for attachment to studs within a wall where possible. Cut horizontal supports to the width of the project. Attach one at the top and bottom marks. Then space supports between at 24-inches on center. Locate studs in the wall and use long deck screws to make solid attachments to the wall structure.

3. Edge Frames
Edge frames create a nice finished look and also help to keep moisture on the sides within the system. Use 1×6 or 1×8 painted trim lumber to finish the sides. Attach with finish nails to the horizontal wood supports.

4. Plywood Mounting Surface
Add 1/2-inch plywood inside the edge frames to provide a solid mounting surface. Attach with nails or small deck screws.

5. Drain Tray
Use a standard PVC drain tray to collect moisture that drips from the bottom of the wall. Connect the drain tray to a drain or direct to a garden nearby.

3. Waterproof the plywood surface
Florafelt Pocket Panels have a rigid backing that keeps moisture away from the walls, however, they do not provide full protection. Small drips may find their way behind the wall over their life, so it is very important to provide a waterproofed surface for permanently mounted panels.
Because mounting the panels requires driving screws directly through the waterproofing and into the plywood, we highly recommend using a Self-Sealing Membrane:
Self-Adhered Peel-and-Stick Membranes (Recommended): Opt for a rubberized or butyl-based peel-and-stick membrane (such as Henry Blueskin, Grace Ice & Water Shield, or similar products).
Why this is necessary: Unlike standard PVC sheets or fluid-applied liquid coatings, self-sealing membranes feature a thick, gummy adhesive layer. When you drive your mounting screws through this membrane to hang the panels, the adhesive actively grips and tightly seals around the screw threads. This automatically waterproofs the penetration points, ensuring moisture cannot wick into the wood behind your living wall.

7. Mark Panel Layout
Measure and mark a grid for panel layout. Use a level. This will ensure a perfect fit. Leave a 2 inch gap at the top for irrigation access and allow room for the plants at top once installed.
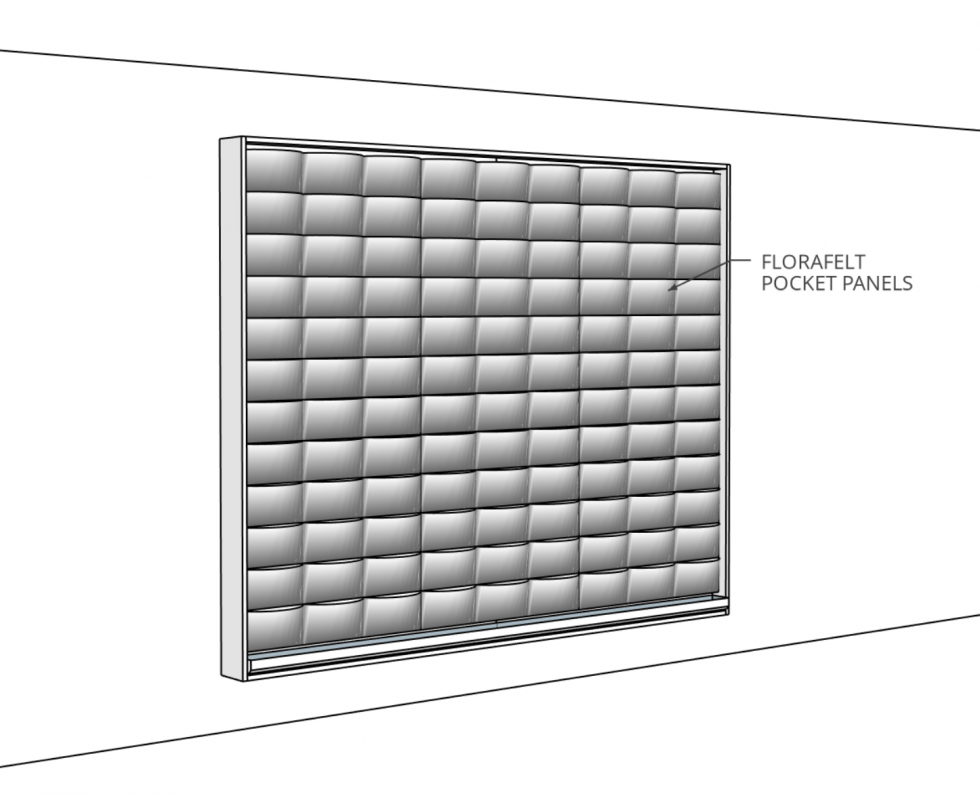
8. Florafelt Pocket Panels
Install the pocket panels. Use 2-inch coated deck screws to mount the panels to the waterproofed plywood understructure. Use 4 screws per panel near the 4 corners of each panel. Hide the screws by adding them behind the 1st outer layer of felt.