
 Image 1 of 1
Florafelt Grow Felt 4 inch x 30 yards
Dimensions & Color: 4" wide × 30-yard roll, 3/8" thick; black.
Grid Compatibility: Pre-slit to 4" widths to fit securely into standard 4"×4" welded wire frames.
Coverage: 1 roll covers approximately 10 sq ft of 4" wire grid.
Sustainable & Reusable: Made from indestructible, recycled PET plastic fibers (water bottles) that can be reused indefinitely.
Moisture & Root Optimized: Proprietary non-woven felt holds and wicks moisture evenly, allowing roots to penetrate the fabric and form a thriving semi-hydroponic root zone.
Plant Sizing: Accommodates 4-inch potted plants up to 1-gallon specimens.
Installation Method: Weave continuously into the wire frame, insert root-wrapped plants (12" Florafelt Root Wraps recommended), and run drip irrigation across the top.
Florafelt Specifications
Durable & Resilient: High tensile strength; will not compact, break down, or bottom out.
Thermal & Acoustic Insulation: Superior temperature buffering with a 0.66 Noise Reduction Coefficient (NRC).
Safe & Non-Toxic: Hypoallergenic and free of irritants, carcinogens, and odors.
Pest & Moisture Resistant: Mold-, mildew-, and moth-proof.
Lightweight & Formable: Flexible, easy to shape, and simple to handle.
Fire Safety Rated: Compliant with FMVSS 302 flammability standards.
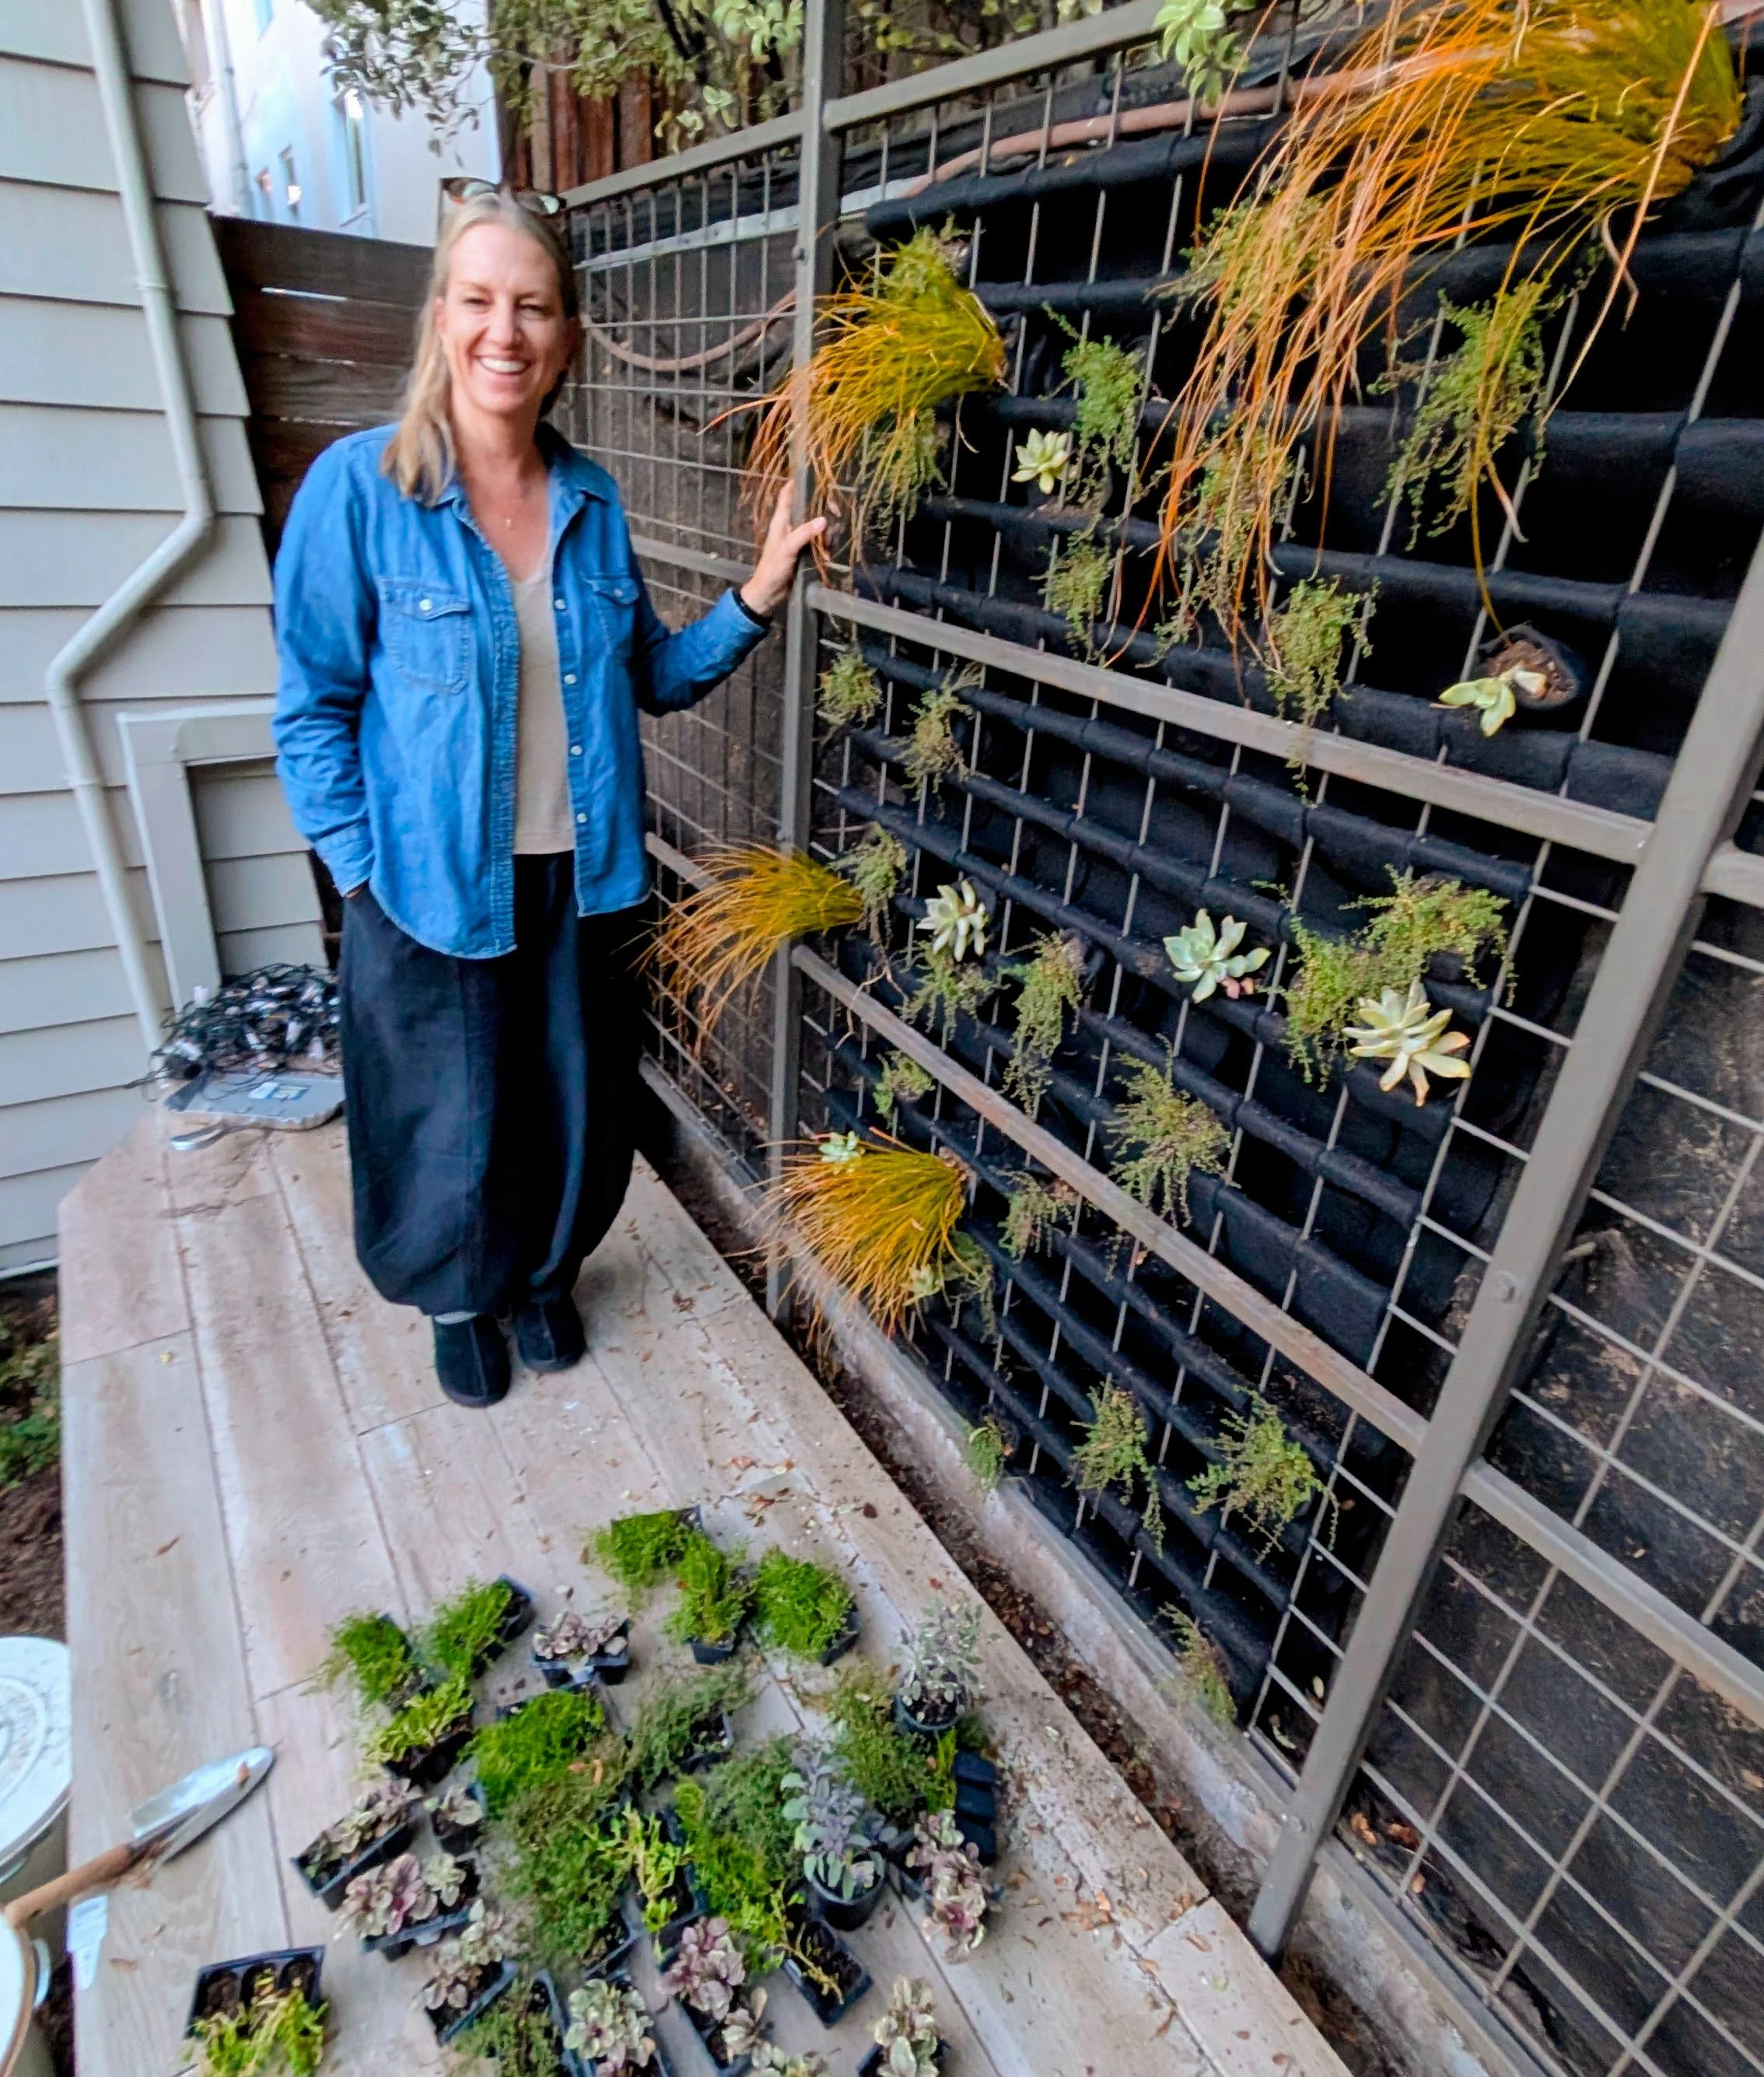
Julie in Oakland, California transforms a 4×4 inch wire grid into a living work of art.
DIY Installation Guide: Transforming a 4-Inch Hog Wire Grid with Florafelt 4-Inch Grow Strips
Standard 4"×4" welded wire fencing (hog wire / cattle panel) is sturdy, affordable, and readily available. When paired with continuous 4-inch Florafelt Grow Strips, it becomes a durable, soil-free living wall frame.
Materials & Tools Checklist
4"×4" Welded Wire Panel / Trellis: Securely anchored to posts, a fence, or an exterior frame.
Backing & Protection: Solid plastic sheeting/root barrier, 2" rigid foam insulation board (for sun-exposed free-standing walls), and stand-off spacers/framing (for air gaps).
4-Inch Florafelt Grow Strip Rolls: Sized to match your grid dimensions (see Step 2 calculation).
Florafelt Root Wraps: One per plant.
Plants: 4-inch potted perennials, ferns, succulents, herbs, or grasses.
Irrigation Supplies: 1/2" drip tubing, top drip emitters, pressure regulator, filter, and timer.
Tools: Heavy-duty utility shears or scissors, UV-resistant zip ties / cable ties, measuring tape.
Conditioning & Plant Care: Mild, unscented plant-safe surfactant (e.g., Seventh Generation Free & Clear) and water-soluble fertilizer (e.g., Jack's Classic).
Step 1: Prepare the Mounting Area & Backing
Before hanging felt, ensure the mounting surface provides adequate space, root containment, and moisture or thermal protection:
Depth Clearance: Verify the area behind the front face of the grid has at least 3 inches of clearance so the woven felt pouches and root balls can expand freely without compressing.
Solid Plastic Root Barrier: Fasten a durable, solid plastic backing directly behind the grid setup. This prevents exploring roots from attaching to structural supports or finding their way into adjacent walls.
Moisture Protection on Wooden Walls (Air Gap): If mounting against a wooden structure, exterior fence, or siding, install spacers to maintain a minimum 2-inch air gap behind the plastic barrier. Constant airflow prevents trapped moisture, dry rot, and mildew.
Thermal Protection for Free-Standing Trellises: If the living wall is free-standing and the back side will receive direct sun exposure, install a 2-inch rigid foam insulation board behind the panel. This shields the root zone from ambient radiant heat and keeps root balls cool and hydrated.
Step 2: Calculate Your Materials
Calculate Square Footage: Multiply the width by the height of your grid (in feet) to find your total area.
Order 4-Inch Felt Rolls: Divide the total square footage by 10 (one 30-yard roll covers 10 square feet of 4" wire grid). Round up to the next single roll if you have a fraction. Florafelt Grow Strip 4-inch x 30 yards
Order Root Wraps: Count the total number of grid openings (one 12-inch wrap per pocket) and divide by 12 to find your total 12-packs. Round up to the next full pack. Florafelt Root Wrap 12-inch (12-pack)
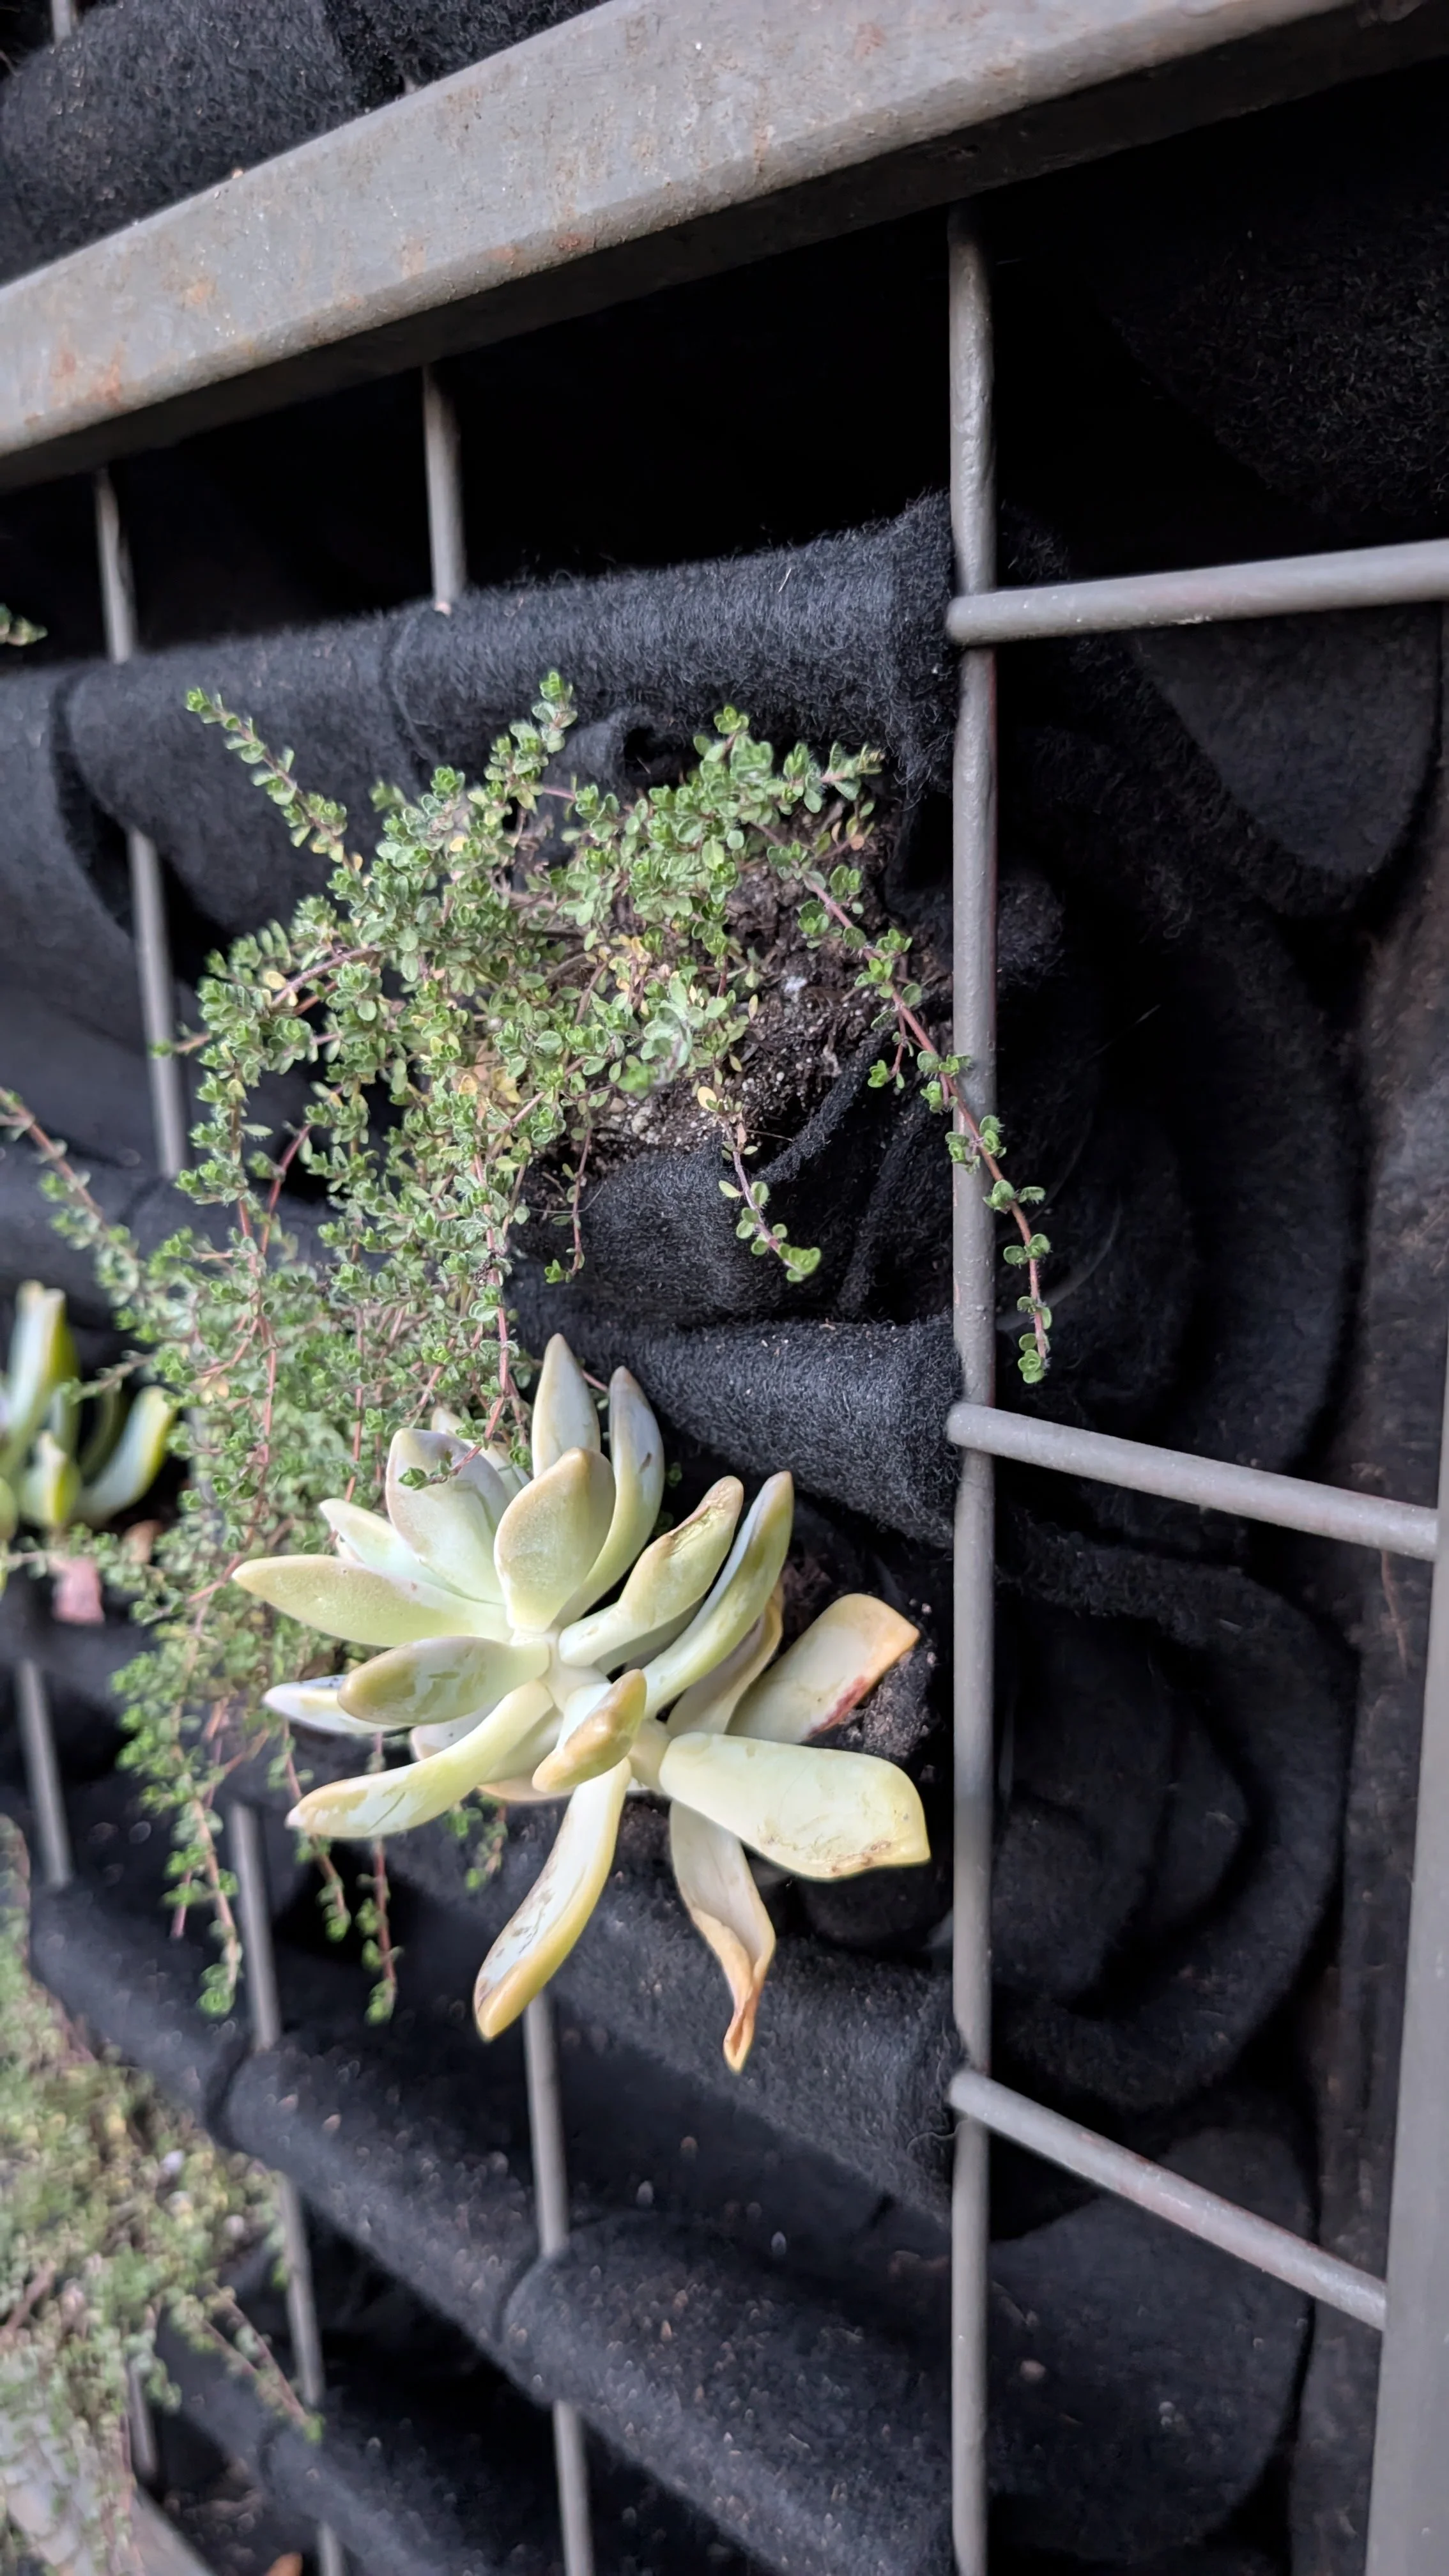
Florafelt Grow Felt 4-inch strips are woven into the grid and wrapped plants are added.
Step 3: Weave the 4-Inch Strips
Work column by column from top to bottom:
Anchor the Top: Loop the top edge of the 4-inch strip around the uppermost horizontal wire of the column. Secure the top flap with a UV-resistant zip tie or fold it over the rear.
Weave the Loops: Drop down to the next horizontal bar. Push the strip forward and loop it down through the grid, creating a soft pouch (approximately 4–6 inches deep) nestled in each 4"×4" opening.
Alternate Front and Back: Weave the strip behind the horizontal crossbar and drop into the next pocket level, keeping the tension consistent so the pockets sit open and receptive to plant inserts.
Anchor the Bottom: At the bottom rung, secure the tail end of the strip to the lowest wire rung with a zip tie or tuck it behind a bottom drainage gutter.
Trim Edge Columns: If your framework ends on an irregular width (e.g., 2-inch or 3-inch gap), trim the width of the felt strip along that column using standard utility shears.
Step 4: Set Up Irrigation & Condition the Felt
Top Drip Line: Run a 1/2" drip line horizontally across the very top row of the trellis, pinning emitters directly above each woven column. Water introduced at the top naturally wicks down through the continuous synthetic felt strip. Drip Tubing & Emitter Kit
Dedicated Timer & Zone: Connect the line to a dedicated zone on an existing drip system, or use a hose-faucet drip timer kit to automate daily watering cycles independently. Drip Irrigation Kit for Large Walls
Condition the Wicking Action: Spray the felt thoroughly with water mixed with a dash of eco-friendly, scent-free dish soap. This breaks surface tension on new synthetic fibers, allowing the felt to absorb and distribute moisture evenly rather than shedding it. ECOS Laundry Detergent Liquid
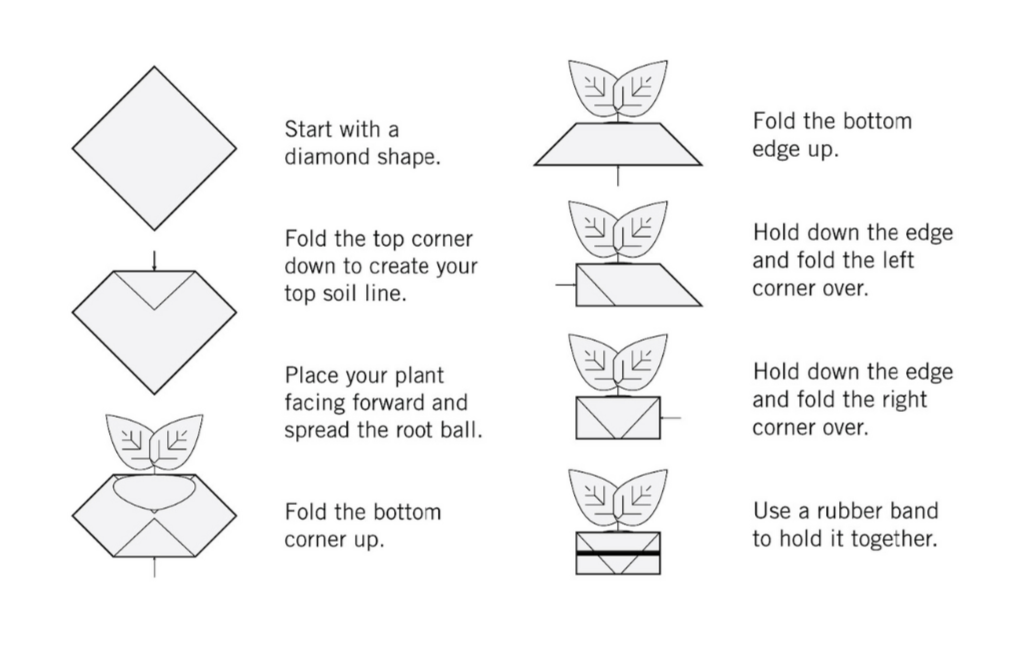
Step 5: Prep & Insert Your Plants
De-Pot & Soil Removal: Gently tap your plants out of their grower pots and brush away roughly 30–50% of loose potting soil, exposing the root surface without damaging major taproots.
Fold the Root Wrap:
Place the plant root ball in the center of a Florafelt Root Wrap.
Fold the felt up and around the root system like a burrito.
Insert Smooth Side Back:
Slide the wrapped bundle into the woven wire pocket.
Crucial Detail: Ensure the smooth, single-layer side of the wrap faces the rear against the back felt strip, while the folded side faces out. This allows the root system to pull moisture directly from the wicking wall.
Step 6: Ongoing Care & Feeding
Hand-Water Early: Provide supplemental hand watering for the first 1–2 weeks until roots grow through the root wrap and anchor directly into the vertical strip.
Fertigation: Since felt contains no native nutrients, add a balanced water-soluble fertilizer (such as Jack's Classic) to your irrigation line or apply monthly as a foliar feed.
Pruning & Rearranging: Because plants sit in individual modular wraps, you can lift, swap, or rotate any plant at any time without disturbing adjacent roots.